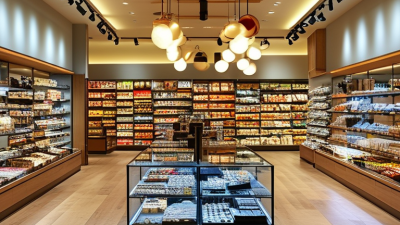
10 Retail Store Lighting Tips to Boost Sales
Retail Store Lighting does more than make merchandise visible; it guides attention, defines atmosphere, and helps shoppers judge color and detail. A warm pool of light over a wooden display feels different from a cool, even wash across a cosmetics shelf. These choices can support a clearer shopping experience, but lighting alone cannot guarantee higher sales. Product selection, pricing, and store layout still matter.
The energy case is measurable. ENERGY STAR’s LED savings guidance reports that LED bulbs use at least 75% less energy and can last up to 25 times longer than incandescent bulbs. Those figures compare bulb types, not whole-store operating costs, so actual savings depend on controls, operating hours, and the existing system. Still, the benchmark shows why efficient fixtures deserve attention alongside visual appeal. Good lighting should make products easy to see without creating glare on glass, harsh shadows beneath shelves, or uncomfortable brightness near the entrance. Small details count. A shopper pausing at a display may notice the product, not the fixture—but the light helps shape that moment. The ten tips ahead connect practical design choices with energy awareness, while recognizing that every store has different ceilings, merchandise, and customer patterns. And sometimes, a carefully planned scheme still needs adjustment after people use the space.
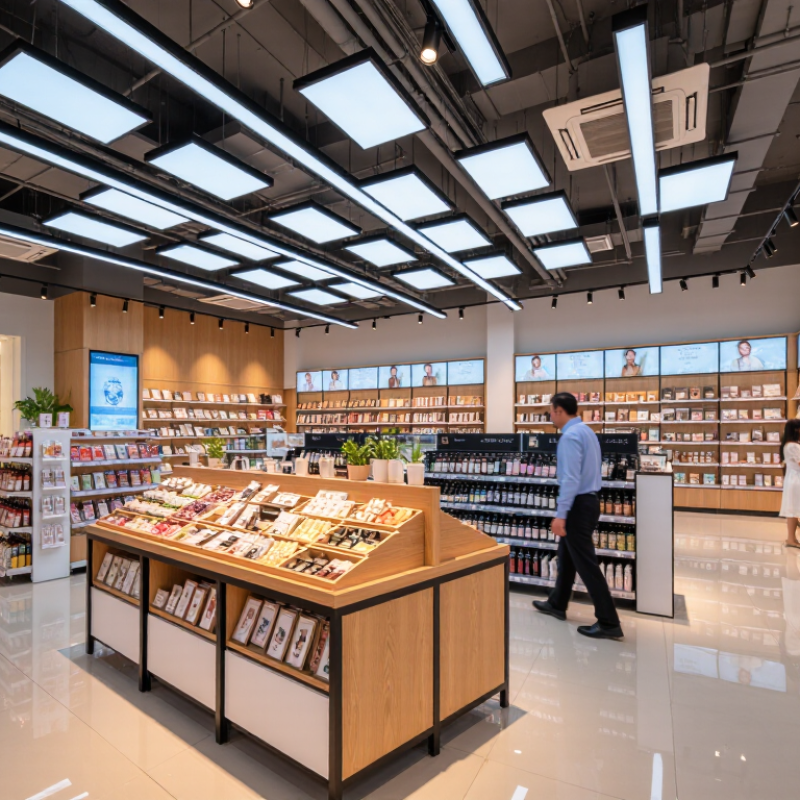
How Retail Lighting Influences Shopper Behavior and Sales
Retail lighting does more than make products visible. It guides attention, shapes mood, and affects how long shoppers stay. A warm pool of light over a wooden table can make folded sweaters feel inviting. Brighter, cooler light near a fitting-room mirror helps customers judge color and detail. Small changes matter.
Use contrast to create a visual path. A focused beam on a new display can draw the eye from the entrance, while even ambient light keeps aisles comfortable to browse. Avoid harsh glare on glossy packaging and screens; shoppers may turn away before they notice the product. In a grocery aisle, accurate color rendering can help fresh produce look true to life. Yet brighter is not always better. Too much light can feel clinical, and the ideal level varies by merchandise and customer.
Test lighting during real shopping hours. Watch where people pause, what they overlook, and whether fitting rooms feel welcoming. A simple adjustment to a spotlight angle may reduce shadows on a display. Track sales alongside customer feedback, but treat results carefully: promotions, weather, and store traffic also influence behavior. I have seen a display look striking after closing, then feel uncomfortable under daytime glare. That mismatch is easy to miss.
How to Plan Lighting for Different Store Zones
Store lighting works best when each zone has a clear purpose. Near the entrance, use bright, even light so customers can adjust comfortably and see the space ahead. Keep pathways free of deep shadows. In display areas, focused lighting can draw attention to textures, colors, and featured products. Aim fixtures carefully; glare on glass or glossy packaging can make details harder to see. At checkout, softer, even illumination helps customers read screens and find payment items without harsh contrasts.
Tips: Test the entrance at different times of day. Window light changes, and a layout that looks balanced in the morning may feel dim by late afternoon. Use adjustable fixtures where possible. A small trial can reveal problems before every light is installed.
Tips: Give fitting rooms and service counters flattering, consistent light, while keeping aisles clear and easy to navigate. Check how products look under the actual fixtures, not just in a planning image. Small details matter. A common planning mistake is making every zone equally bright; that can flatten displays and waste energy. Still, dramatic contrast is not always better. Walk the store from a customer’s view, then adjust brightness, beam direction, and color temperature to suit the merchandise.
10 Retail Store Lighting Tips to Boost Sales — How to Plan Lighting for Different Store Zones
| Store Zone | Planning Tip | Typical Illuminance | Suggested Color Temperature | Key Lighting Detail |
|---|---|---|---|---|
| 1. Storefront & Window Displays | Use a clear focal point to draw attention to featured merchandise from outside. | About 1,000–2,000 lux on display surfaces | 3,000–4,000 K | Use adjustable accent lights and control reflections on the glass. |
| 2. Entrance & Transition Area | Create a comfortable visual transition between outdoor light and the sales floor. | About 200–500 lux | 3,000–3,500 K | Avoid abrupt brightness changes, glare, and dark patches near the entrance. |
| 3. Main Aisles | Provide even light so shoppers can navigate comfortably and find departments. | About 300–500 lux on the floor | 3,000–4,000 K | Space fixtures evenly and check that shelving does not create deep shadows. |
| 4. General Merchandise Shelves | Make product labels and merchandise easy to see without excessive contrast. | About 500–750 lux on merchandise | 3,000–4,000 K | Supplement overhead lighting with vertical or shelf-integrated light where needed. |
| 5. Feature & Promotional Displays | Give seasonal, new, or high-priority products stronger visual emphasis. | About 750–1,500 lux on display surfaces | 3,000–4,000 K | Use directional accent lighting; aim for a noticeable but comfortable contrast. |
| 6. Apparel & Fitting Rooms | Show fabric color and texture naturally, with flattering, balanced illumination. | About 300–500 lux in fitting rooms | 2,700–3,500 K | Use high color rendering (CRI 90 or higher where practical) and soften facial shadows. |
| 7. Beauty & Personal Care | Support accurate color perception for products and close-up browsing. | About 500–1,000 lux on displays | 3,500–4,000 K | Choose high color-rendering light and avoid glare on glossy packaging and mirrors. |
| 8. Fresh Food & Produce | Keep the display bright and inviting while presenting food colors accurately. | About 500–1,000 lux on display surfaces | 3,000–4,000 K | Select suitable light sources for the products and follow food-safety requirements. |
| 9. Checkout & Service Counter | Make transactions, payment screens, and service interactions clear and comfortable. | About 300–500 lux on work surfaces | 3,000–4,000 K | Limit reflections on screens and keep the counter evenly lit. |
| 10. Focal Points & Signage | Use light to help shoppers notice wayfinding signs and key visual features. | About 500–1,000 lux on signs or focal surfaces | 3,000–4,000 K | Keep text legible, avoid hotspots, and use dimming or scheduling for flexibility. |
Illuminance values are indicative planning ranges, not universal requirements. Final levels depend on merchandise, finishes, daylight, fixture placement, and applicable local standards. Measure light at the relevant surface and review glare, uniformity, and energy use during commissioning.
How to Choose Color Temperature, Brightness, and Color Accuracy
Choose color temperature by merchandise and finish, not by habit. Warm white around 2700–3000 K can flatter wood, leather, and skin tones. Neutral white near 3500–4000 K often suits groceries, cosmetics, and crisp white interiors. Test samples under the actual ceiling, then check them at opening and closing time. Daylight from the storefront can shift the look. A small test bay is worth the effort.
Brightness should guide attention without washing out labels or creating glare on glass. Aim light at displays, then keep aisles comfortable and even. For color accuracy, review the Color Rendering Index (CRI), but do not treat one score as a guarantee. The U.S. Department of Energy notes that LEDs use at least 75% less energy than incandescent lighting; that helps explain their retail appeal, though savings depend on the system and operating hours. Ask suppliers for measured performance data, including CRI and, where available, TM-30 results. Hold the same red garment beneath competing fixtures. Look closely. Some colors still feel wrong, and that deserves another test.
10 Retail Store Lighting Tips to Boost Sales
Use layered lighting to make merchandise easy to see and key displays stand out. The chart shows practical target illuminance ranges for common retail areas; actual levels depend on the space, finishes, and task.
Color temperature: Choose a consistent warm-to-neutral white suited to the store’s atmosphere and products. Brightness: Balance ambient light with brighter accents, avoiding glare. Color accuracy: Look for high color rendering (CRI 90 or higher where accurate product colors matter).
How to Highlight Products with Layered Lighting
Layered lighting helps shoppers notice products without making a store feel harsh. Start with ambient light, such as evenly spaced ceiling fixtures, so customers can see colors and move safely. Then add focused accent lights above displays or along shelves. Aim beams at the merchandise, not directly into customers’ eyes. A small adjustment in angle can reduce glare on glass packaging.
Use task lighting where people compare details, such as a fitting area or product counter. For clothing, a high color-rendering light can make fabric tones appear more natural. Check samples under the actual store lighting before choosing fixtures; colors can look different in daylight. Warm light may suit wood and soft furnishings, while cooler light can help a clean, technical display feel crisp. Keep the contrast intentional. Too much brightness on one shelf can make nearby products seem dull.
Leave room to test. Walk the floor at opening and again after dark, when window light changes. Look for shadows under shelves, bright spots on the floor, and reflections in glossy surfaces. I’ve seen a carefully lit display lose its appeal because a beam caught a customer’s eye instead of the product. It happens. Adjust one layer at a time, and ask staff which items shoppers actually pause to examine. Their observations may challenge the original plan.
How to Improve Comfort and Efficiency Through Lighting Controls
Lighting controls can make a shop feel calmer while reducing wasted energy. Divide the sales floor, fitting rooms, stockroom, and window displays into separate zones. A single switch for the entire store is simple, but it can leave bright aisles glowing after closing. Keep it practical.
Use dimming to adjust light levels throughout the day. Near a front window, daylight may be strong at noon and weaker by late afternoon. A photosensor can respond to those changes, but it needs careful placement and calibration. Otherwise, displays may look uneven or lights may dim too aggressively. Check how products appear under different settings.
Occupancy sensors can help in storage areas and staff rooms, where lights are often left on. They may be less suitable for busy sales aisles, where brief pauses could trigger unwanted darkness. Set delays to match how people actually move through the space. Test the controls during opening hours, not just when the store is empty. More automation is not always better. Staff should understand the switches, and managers should review settings after seasonal layout changes. A control plan can improve comfort and efficiency, but only if it works with the store’s routines.
Related Posts
-
2026 Best Retail Store Lighting Types for Global Buyers
-
How to Choose Retail Lighting for Global Stores in 2026?
-
Maximize Retail Sales with Innovative Store Lighting Solutions Boosting Customer Experience
-
Essential Guide: 7 Key Factors Global Buyers Must Consider When Sourcing from a Lighting Gallery
-
What is Window Lighting and How to Use it Effectively?
-
Mastering Best Fashion Lighting Techniques for Stunning Interior Environments